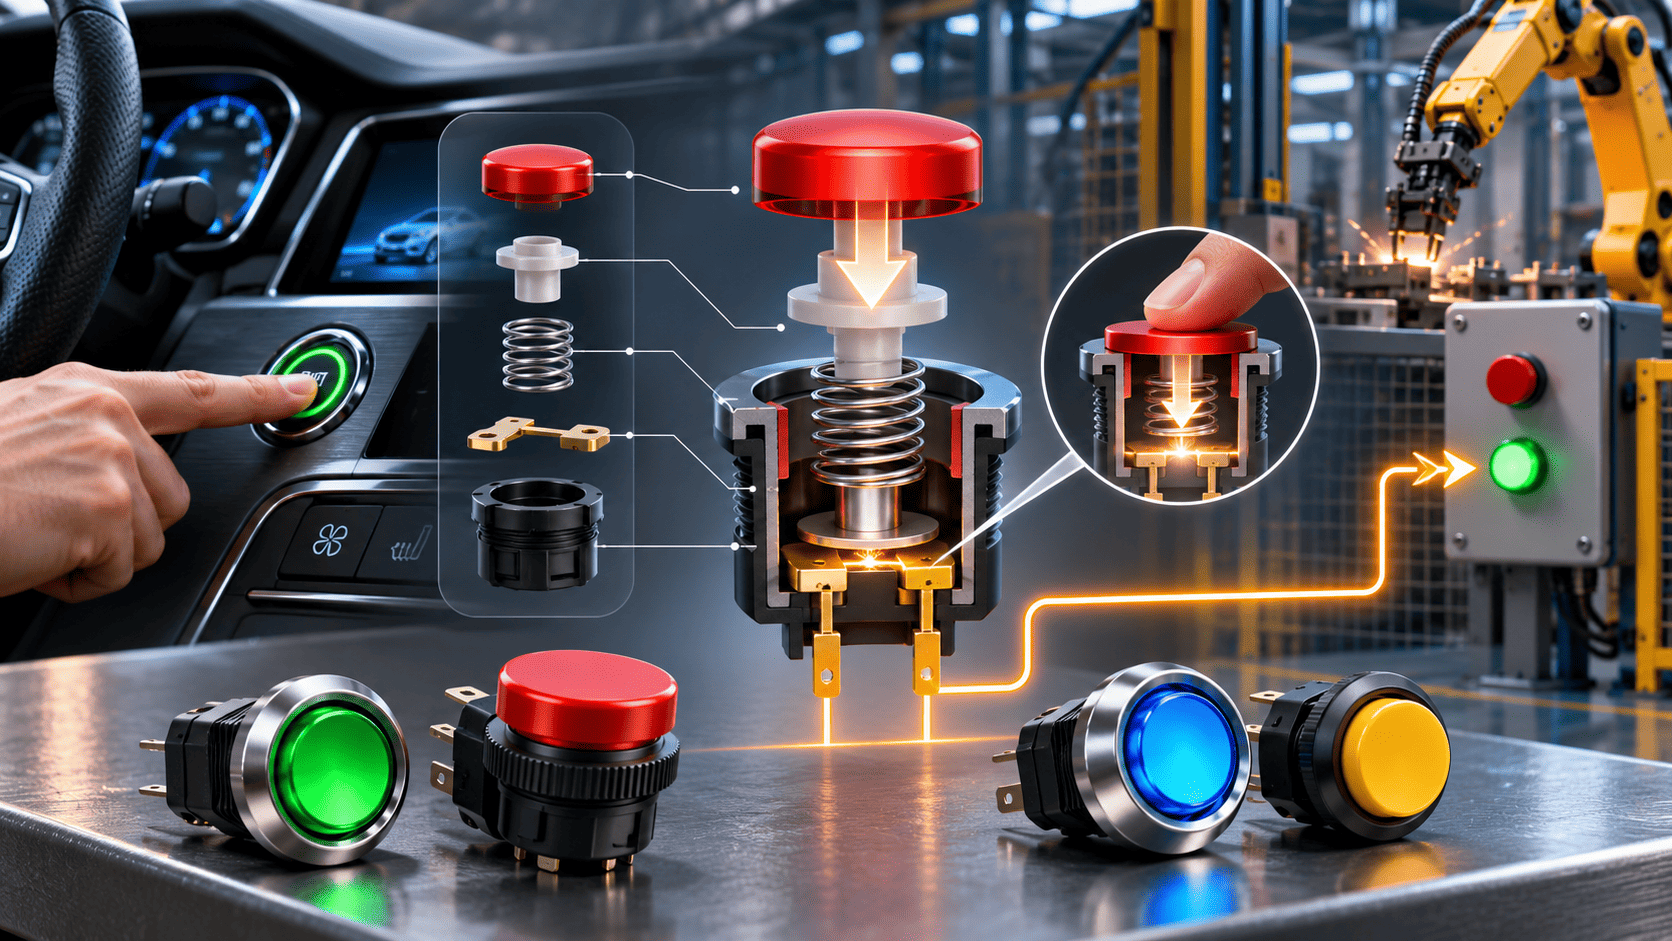
Push button switches open or close an electrical circuit when you press them. Every time you press the start/stop button in a modern car, you are using one. The same basic part also sits behind the controls on a garage air compressor, a bench grinder or a workshop control panel.
If you have ever wondered why one button springs back the moment you let go while another stays down, this guide explains it. We start with what happens inside the switch, then cover the choices that matter when you pick one for a car project or a home garage build.
How Push Button Switches Work Inside
A push button switch has three basic parts: an actuator (the part you press), a spring, and a set of electrical contacts. Pressing the actuator moves the contacts. Either they touch and let current flow, or they separate and break the circuit.
Contacts come in two basic types. Normally open (NO) contacts are apart at rest and close when pressed. Normally closed (NC) contacts touch at rest and open when pressed. Many industrial blocks carry both, so a single press can switch one circuit on and another off.
In a car, the start/stop button does not usually carry engine-level current. It sends a small signal to a control module, and the module does the heavy lifting through relays and drivers. That is why a small switch can start a large engine. The same pattern shows up in the garage, where a compact button signals a contactor instead of switching a motor directly.
Momentary vs Latching Action
The most common question about pushbuttons is how momentary and latching types differ.
A momentary switch only changes state while you hold it. Let go and the spring returns it to rest. Car horns, starter buttons and window switches work this way. In a workshop, the green “start” button on a machine is usually momentary.
A latching button switch locks in place after one press and stays there until you press it again. Think of a hazard light button or a work light switch. Latching types are handy when you want a circuit to stay on without anyone holding a button down.
Many machines combine both ideas. A momentary start button energises a relay, and the relay holds itself on until a momentary stop button breaks the circuit. This arrangement is useful because power loss resets the machine to off, so it does not restart on its own when the supply returns.
Emergency Stop Buttons
Emergency stop variants are a special case. They are large, usually red buttons on a yellow background. Pressing one latches it down, and you must twist or pull it to release it. The release step is deliberate, so a machine cannot restart just because someone bumped the button back up.
If you add an emergency stop to a home workshop machine, treat it as a safety device and wire it according to the machine maker’s guidance and the electrical rules that apply in your area. If you are unsure, have a licensed electrician check the circuit. Relevant Australian and international safety standards exist for machine controls, and a qualified person can tell you which ones apply to your setup.
Choosing the Right Switch for the Job
Before you buy, run through this short checklist.
Action type. Decide whether you need momentary or latching. A start button and a stop button are usually momentary. A lighting or accessory circuit often suits latching.
Contact arrangement. Count the circuits you need to switch and whether they should be NO, NC or both.
Electrical rating. Check that the contacts are rated for the voltage and current in your circuit. Using a signal-level switch on a power circuit is a common cause of burnt contacts.
Illumination. Illuminated push button options show at a glance whether a circuit is live. They are popular on workshop panels, where you want to see that a machine is powered before you reach for it.
Environment. Garages are dusty, damp and sometimes oily. A switch with a higher ingress protection rating handles this better. The first digit of an IP rating covers solid objects and dust. The second covers water. IP65 means dust tight and protected against water jets, while IP67 adds protection against temporary immersion. A button at a washdown bay or an outdoor pump needs this protection far more than one inside a dry cabinet.
The 22mm Panel Mount Format
Most industrial push buttons follow the 22mm panel mount format. You drill a round hole of about 22 millimetres in a panel or enclosure lid, push the button through from the front and lock it in place from behind with a ring nut. Contact blocks and lamp modules clip onto the back.
The standard hole size is the reason this format is so practical. Buttons, selector switches and pilot lights from different makers fit the same cut-out, so you can mix and match on one panel. A control panel with a green start button, a red stop button, a selector switch and a pilot light can all use identical holes.
Sourcing Switches for Australian Workshops
Once you know the action type, contact arrangement, rating and format you need, the next step is finding a supplier that stocks proper industrial parts rather than generic bargain bin switches. For buyers in Australia, a dedicated push button switches distributor is a sensible place to compare options, because the range includes push button switches from Schneider Electric, ABB, Siemens, Omron, IDEC, Eaton, APEM and RS PRO, among other brands, in one catalogue. That makes it easier to match IP65/IP67 environmental ratings and the 22mm panel mount format to the control panel builds and machinery you are working on. For locally stocked items ordered before 5pm AEST on weekdays, next working day delivery applies, which helps when a project is waiting on one missing part.
Always check the datasheet before you order, including mounting depth against your enclosure.
TL;DR
- Push button switches open or close a circuit when pressed.
- Momentary buttons only act while held. Latching buttons stay in position until pressed again.
- Match contacts, electrical rating and IP rating to the environment.
- The 22mm panel mount format lets you mix buttons, selector switches and pilot lights on one panel.
- Treat emergency stops as safety devices, and ask a licensed electrician if you are unsure.